
Photos that we take during our travels are always perfect, right? No way, at least not for me! I usually end up with someone in the background, a hand off to the side, or even a bird in the wrong spot. Whatever it is that has marred your photo, you can try to remove it. There are many options in Photoshop and Photoshop Elements, such as the Eraser Tool, Spot Healing Tool, and the Clone Tool. Photoshop CS5 or Photoshop Elements 9 and up offer a cool new feature to remove unwanted "pieces" of your photo: Content Aware. Content Aware is a function that, while not perfect, can really improve your photos with a little tweaking and patience. This single feature allows you to edit your photos without the visual signs that the edits were completed. Give it a try on a simple removal in one of your photos and you might surprise yourself!
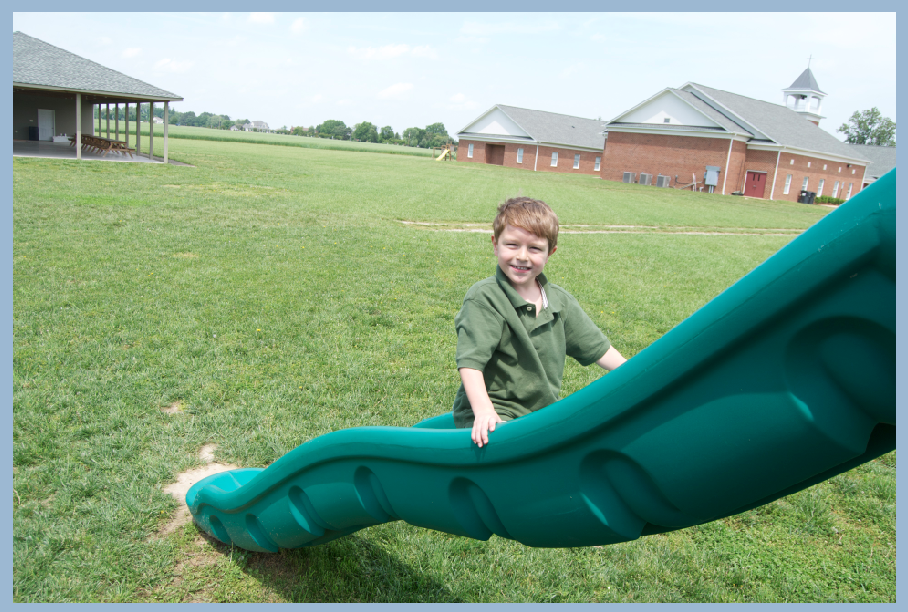
Step 1: Open your photo in Photoshop, and be sure to save it as a new document. Here is my son, Shayne, climbing up the slide. You can see his little brother, Colin, in the background in blue.
 |
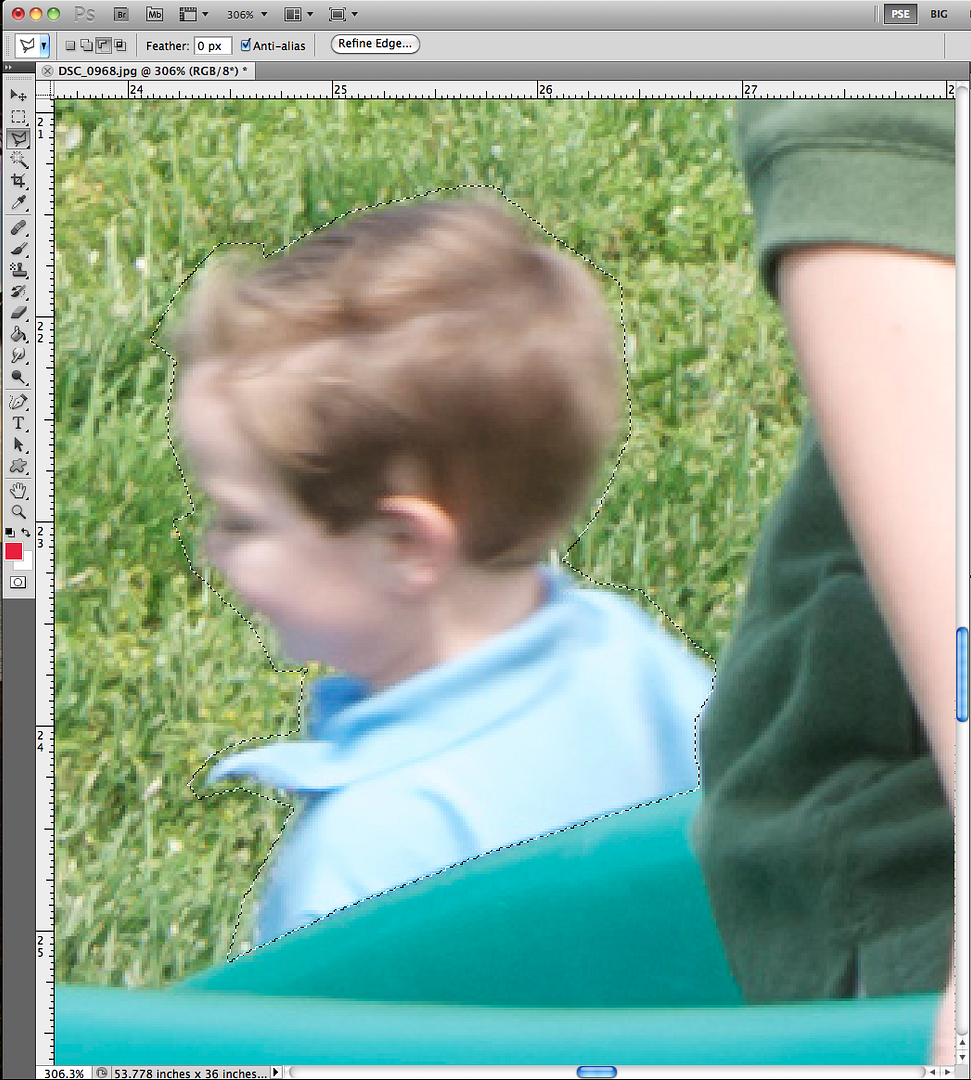
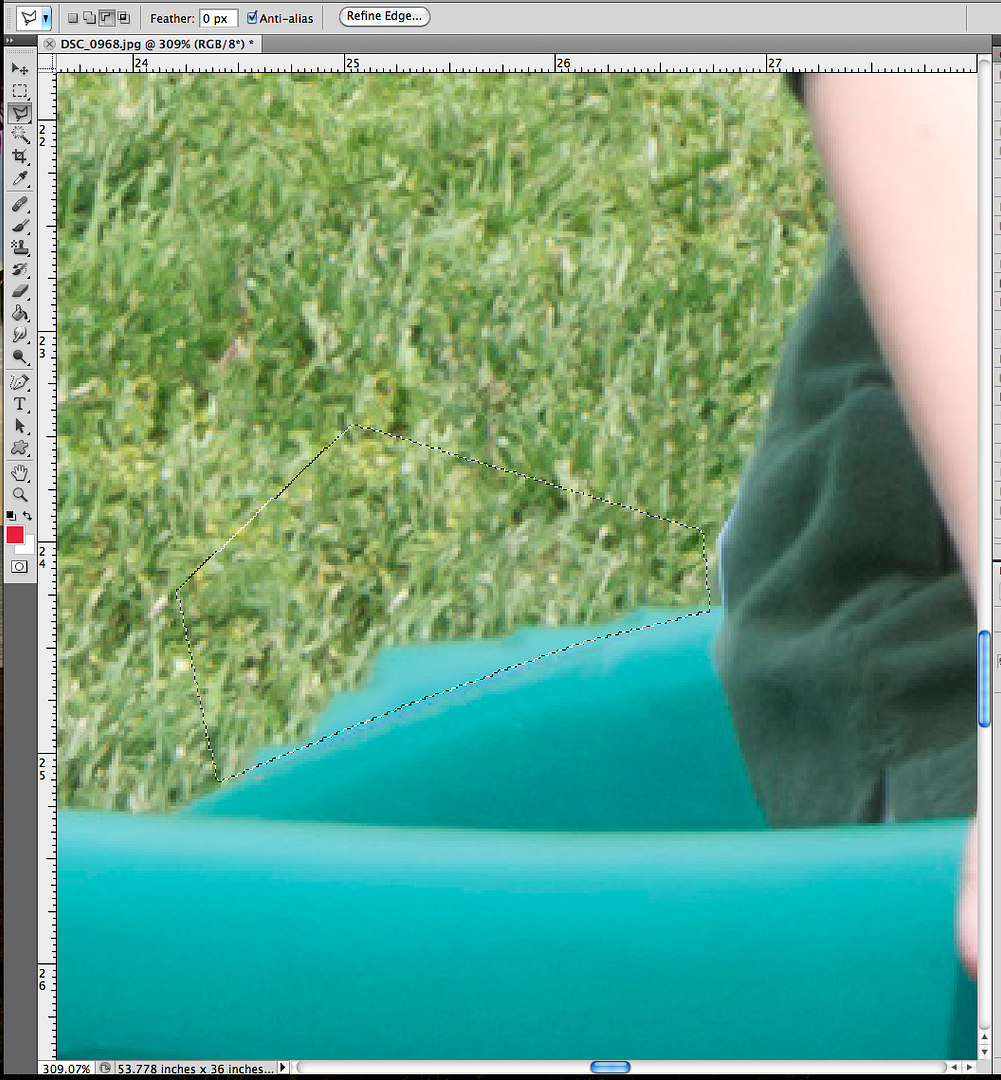
Step 2: Choose the Lasso Tool and click around the item that you will be removing from your picture. Here is a close up of Colin and what I plan to remove from my photo. I stayed relatively close to the edge so I don't remove other parts of the photo that I want to stay.
Step 3: Choose Edit in the toolbar, and then click on Fill.
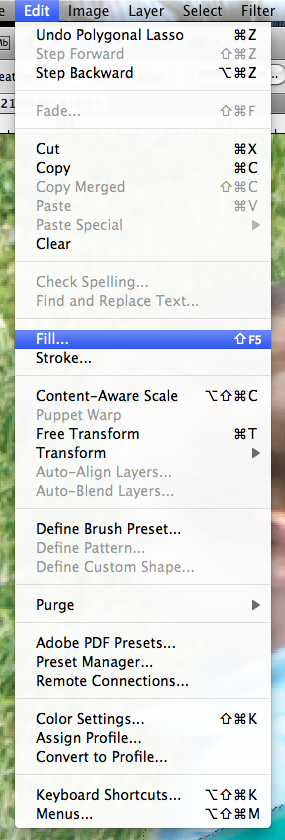
Step 4: A menu will pop up before you can continue. Within this menu, click on the drop down arrow under "Contents:" and "Use:" and choose Content-Aware. Click Ok.
Step 5: Here is a close up of the Content Aware fill that the software generated. Not too bad at all! Since I have played around with the Content Aware feature, I have found that sometimes there is a need to complete the fills by making a new selection and using the tool again (or maybe a few more times).
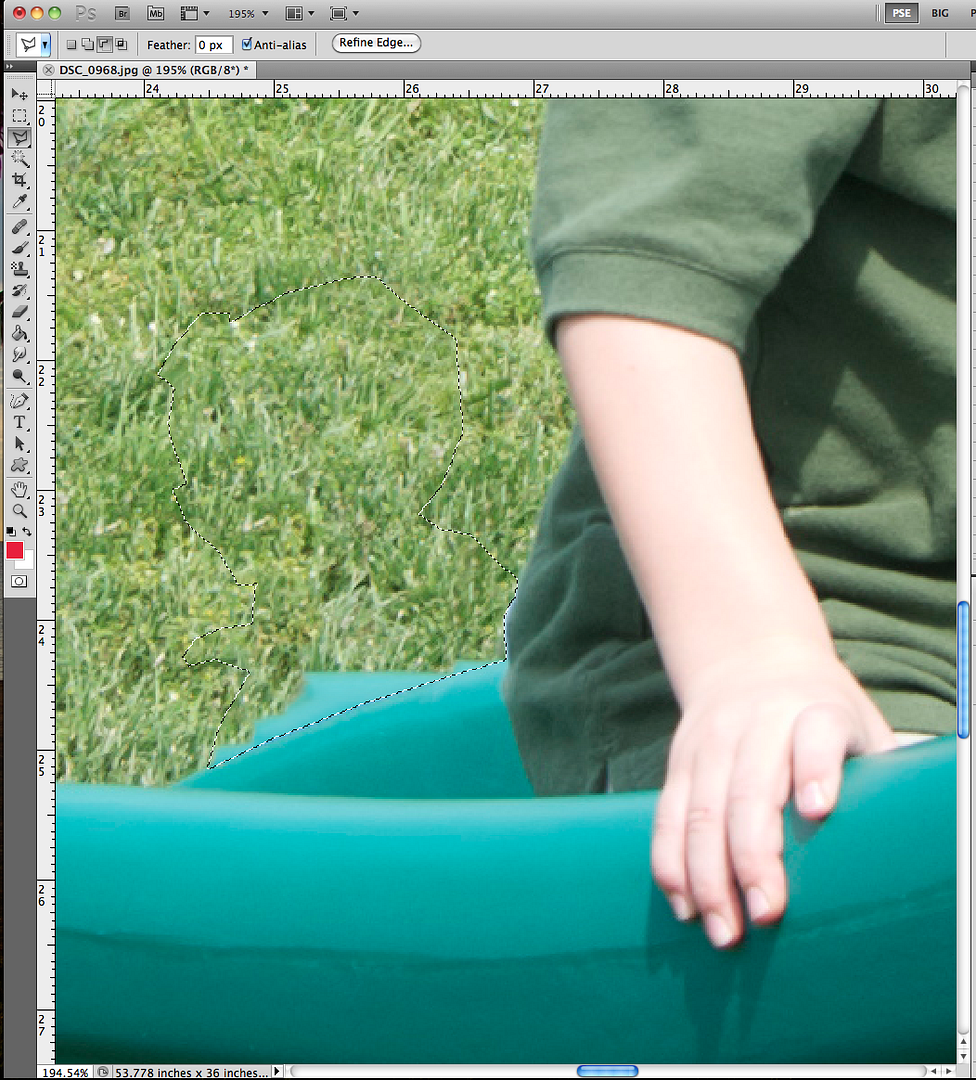
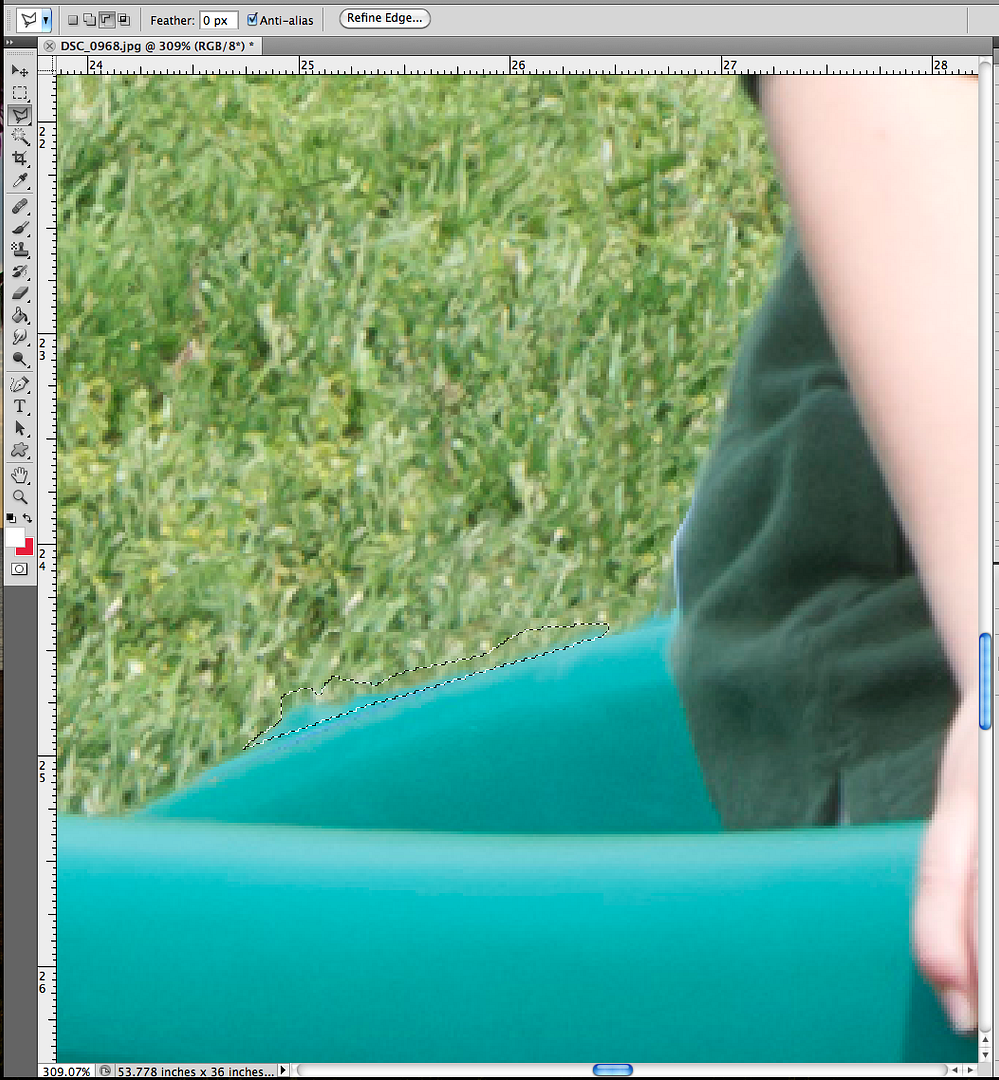
Step 6: Since I still have a jagged edge on the green slide, I will run a Content Aware Fill again by following the same steps as I did previously. If you need to complete a second round of the fill, you will press Control-D to deselect the area. Then begin again at Step 2 with the Lasso Tool. Here is my second go round of a Content Aware fill with the image from Step 5.
Step 7: I like my image, but I am one who likes smooth edges and a continuous look. I decided to try using the Content Aware one last time. Here are my final results, still a little jagged, but after I zoom out, it will look great!
Final Image:
Remember, Content Aware is a feature to help make your photos better; it cannot make them perfect. I showed a picture that used multiple steps to remove the unwanted portion. You have the ability to step back or "undo" what you have filled in, so there isn't a worry about damaging your photo memories. Not all pictures will be difficult; some may be easy. Here are a few before and after photos with easy Content Aware removals.
Before, with a dock piling:

After, dock piling removed:

Before, fence and cell tower:

After, fence and cell tower removed:

There you go! Hope that helps removing some of those unwanted background items! I originally wrote this article for the ScrapMatters Quarterly Magazine!
Thanks for visiting!
Jenn (jk703/The Typative Scrapper)
No comments:
Post a Comment