Showing posts with label Newsletter. Show all posts

Sunday, October 30, 2011

Tutorial: Content Aware

Photos that we take during our travels are always perfect, right? No way, at least not for me! I usually end up with someone in the background, a hand off to the side, or even a bird in the wrong spot. Whatever it is that has marred your photo, you can try to remove it. There are many options in Photoshop and Photoshop Elements, such as the Eraser Tool, Spot Healing Tool, and the Clone Tool. Photoshop CS5 or Photoshop Elements 9 and up offer a cool new feature to remove unwanted "pieces" of your photo: Content Aware. Content Aware is a function that, while not perfect, can really improve your photos with a little tweaking and patience. This single feature allows you to edit your photos without the visual signs that the edits were completed. Give it a try on a simple removal in one of your photos and you might surprise yourself!

Step 1: Open your photo in Photoshop, and be sure to save it as a new document. Here is my son, Shayne, climbing up the slide. You can see his little brother, Colin, in the background in blue.


Step 2: Choose the Lasso Tool and click around the item that you will be removing from your picture. Here is a close up of Colin and what I plan to remove from my photo. I stayed relatively close to the edge so I don't remove other parts of the photo that I want to stay.


Step 3: Choose Edit in the toolbar, and then click on Fill.


Step 4: A menu will pop up before you can continue. Within this menu, click on the drop down arrow under "Contents:" and "Use:" and choose Content-Aware. Click Ok.


Step 5: Here is a close up of the Content Aware fill that the software generated. Not too bad at all! Since I have played around with the Content Aware feature, I have found that sometimes there is a need to complete the fills by making a new selection and using the tool again (or maybe a few more times).


Step 6: Since I still have a jagged edge on the green slide, I will run a Content Aware Fill again by following the same steps as I did previously. If you need to complete a second round of the fill, you will press Control-D to deselect the area. Then begin again at Step 2 with the Lasso Tool. Here is my second go round of a Content Aware fill with the image from Step 5. 


Step 7: I like my image, but I am one who likes smooth edges and a continuous look. I decided to try using the Content Aware one last time. Here are my final results, still a little jagged, but after I zoom out, it will look great!


Final Image:


Remember, Content Aware is a feature to help make your photos better; it cannot make them perfect. I showed a picture that used multiple steps to remove the unwanted portion. You have the ability to step back or "undo" what you have filled in, so there isn't a worry about damaging your photo memories. Not all pictures will be difficult; some may be easy. Here are a few before and after photos with easy Content Aware removals.

Before, with a dock piling:


After, dock piling removed:


Before, fence and cell tower:


After, fence and cell tower removed:


There you go!  Hope that helps removing some of those unwanted background items!  I originally wrote this article for the ScrapMatters Quarterly Magazine!

Thanks for visiting!
Jenn (jk703/The Typative Scrapper)


Friday, June 10, 2011

Vanquish That Green Eyed Monster!

Does the family pet or your furry friend give you the "green" eye? Many times when I take a picture of an animal, such as dogs, cats, birds, hamsters and the like, they are posing for the picture but they have these crazy green or yellow glowing pet eyes! That is the animal version of red eye that we sometimes get in our photos. Many animals eyes have an extra reflective layer which causes those pesky eyes to turn odd colors. Here is a tutorial for removing that reflective glow from your pets' eyes.

I'd like to introduce you to Harvi. Here he is in the original version of the photo I'll be working with for this tutorial. To start off, I've opened, cropped, and saved a new version of my photo so the original will be available if I need it in the future.


You begin by using the Polygonal Lasso Tool to select the portion of the pet eyes that you want to fix. I prefer to use the Polygonal Lasso Tool, as the Magic Wand always seems to grab other areas that I do not need included from all over the picture. The Polygonal Lasso allows for a more detailed selection than the regular Lasso tools. Since animal eyes are not always round or oval and some times are just odd shape, I find that the Circle or Elliptical Lasso Tools are not the best choice for this type of selection. You will need to zoom in close to each eye to make your selections. Also, make sure the "Add to Selection" is chosen from the Polygonal Lasso Tool menu bar. Additionally, when using the Polygonal Lasso Tool on a rounded edge, to make sure it remains rounded, just use extra anchor points as you go around the curve.


With your picture selected in the Layers Palette on the menu bar, choose Layer > New > Layer Via Copy.


Next, rename the copied layer in the Layers Palette to "Eye Desaturate." With this layer selected in the Layers Palette, you will now desaturate the selection. Choose Image > Adjustments > Desaturate. This quickly allows you to change the layer's color to grey. The eyes should look similar to this:  


Next, duplicate the Eye Desaturation Layer and rename the new copied layer "Burn Tool and Blur Tool." Press D on your computer to make sure your foreground and background colors return to the default setting.

Choose the Burn Tool (a sub tool with the Sponge) and change the exposure to 50%. Now paint black on the eye all over. The white parts should remain white while the grey parts will darken. Paint until all areas are colored. They may look similar to my image, here:


In this picture, the eyes are too bright for my taste and I want to add a little more light reflection. I decided to lower the layer'ss opacity to 55%. You can play with the opacity in your photo so the color of the eyes is to your liking.


Sometimes there are harsh lines that you may feel need to be softened on the eye; you can use the Blur Tool to fix those. Choose the Blur Tool and change the strength to a range of 10% - 25%. With the "Burn Tool and Blur Tool" layer Selected, blur the edges that you want softened.


Merge your layers by right clicking on the top most layer in the layers palette. Choose Merge Layers. The Green Eyed Monster has now been vanquished, and your family pet is back to stay!

Before:

After:

Tips: 
  • If you didn't get the whole area that needs to be color changed, you can modify your selection. Choose Select > Modify > Expand. When the submenu pops up, enter the number of pixels the selection should be expanded by. I've seen ranges from 1-8 used, but go by your picture and selection. 

    • If you add catchlights back to the eyes or want to brighten certain spots, make sure to create a new layer. Use the white foreground color, and brush onto each eye carefully. 
    • For cat's eyes, try using an oval shaped brush when adding reflections back to the eye.
    • For my example of a cat, here is Nala. I used a white oval brush to add some bright spots back to the eyes. Cats' eyes are a little more difficult to on because of the shape of their eyes and pupils.
    Before:


    After:

    Special Thanks to Photonut71/Kris for the picture of Harvi and MsBrad/Michelle for pictures of Nala.


    This article was originally created by me for the ScrapMatters Newsletter.  You can sign up and recieve these too!


    Thanks for visiting!
    Jenn
    (jk703/The Typative Scrapper)

    Friday, March 25, 2011

    Antiquing: Digi-Style

    Antiquing is a technique that is growing in digital scrapbooking - largely due to the popularity of everything vintage! Many people use scanned or vintage photos in creating their layouts, but what if you have a photo from today that you would like to make look older? Trying out some reverse photo restoration is a fun way to play with photo editing. And what if you could use your digital scrapbooking stash to do it...even better, right? There are so many easy possibilities! This tutorial will teach you how to combine your photo-editing software and some digi-scrap goodies, to end up with an "antiqued" photo for your layout. Keep in mind, this is just one of many ways to do this in Photoshop, this is just one.

    First, open your photo in Photoshop. Then, create a duplicate layer (Control + J), so the original is still available to you if you need it! I will turn the Background layer off of my view. I named my duplicate layer Picture 1.

    Next, choose your crop tool, and crop your photos to a square or rectangle. Many old photos were square - though this is optional. 

    The next step is to desaturate your photo. Choose your Picture 1 layer, and then Image > Adjustments > Desaturate. This will make your image a greyscale.


    Click on your Picture 1 layer in the Layers Palette, and then: Filter > Blur > Gaussian Blur. You want to blur the picture enough that some of the detail goes away, but so that you can still see what it is. My setting for this example is 1.5, but play with the pixel range until it is visually appealing to you. 


    Next, create a new layer on top of Picture 1 and name it Noise. Fill this new layer in with black. With the blackened Noise layer selected, go to: Filter > Noise > Add Noise. The percentage should be around 125 - 150% -- we want lots of noise and then we can quiet it down to a comfortable level of noise! Also, make sure that Gaussian and Monochromatic are selected. In the Layers Palette, select the Noise Layer and change the blending mode to Soft Light. Lower the opacity of the layer to what you like for your photo. 


    Now, I've imported a mask and overlay from Happy Scrap Girls Worn Out Overlay's Volume 6, and a paper from Laitha's Designs, Light Grunge: Set 1. These are awesome tools to make any picture look older, or gently loved! Move the layers around in the Layers Palette to the following, top to bottom: Light Grunge Paper, Overlay, Noise, Picture 1, Mask, and Background. For my example, I've clipped everything to my picture, and then started playing with the blending modes and opacity. Specifically for my picture I have the following:

    Picture 1 -- Normal Blending, and 90% opacity
    Noise -- Soft Light Blending and 30% opacity
    Overlay -- Overlay Blending and 100% opacity
    Paper -- Linear Burn Blending and 44% opacity


    Each blending mode and layer opacity can change the whole effect, so play with it. You might also try to create a second copy of your picture and leave it in color. When you do that, you could have a colorized old photo look! Here is an example of the desaturated photo and then the same photo with a color version of the antiquing.


    Changing your pictures and using your digital supplies on them really allows you to use your stash in a whole new way! Any paper will give you a whole new look with a fun blending style used. Adding a texture will show off the photo. Give it a try -- you might find a new technique to love!

    Some other cool overlays, textures and papers to use these techniques with are:


    Links to products used: 
    Laitha's Designs - Papers:http://shop.scrapmatters.com/product.php?productid=7642&cat=0&page=2
    Happy Scrap Girl Overlays: http://shop.scrapmatters.com/product...5&cat=0&page=1

    This article was originally created by me for the ScrapMatters newsletter!  Sign up today for a fantastic always over 20 page inspiring monthly newsletter: HERE!  


    Thanks for visiting!
    Jenn
    (jk703/The Typative Scrapper)

    Sunday, February 27, 2011

    Masking Unmasked

    Masking Unmasked
    Masks are ways that you can change up your layout and give it a little fade effect that will make the whole layout pop! This is a really easy technique to learn. You can use masks for many many things, but it seems that they are widely used with papers and photos. When you learn how to mask, you are also learning a way to non-destructively edit your photos. By that, I mean that you are able to restore your image back to the way it was originally. I also find that masks are much easier to use than working with the eraser tool, and by far, the quickest! Here are a couple of ways to try out masks for your layouts. 

    Basic Clipping Mask:
    1. Open your photo in PSE or PS.
    2. Start a New Document, by Right Clicking and Duplicating your photo in a New or Untitled file. Save.
    3. Select the photo mask you wish to use, and open it in PSE or PS.
    4. Drag the photo onto the photo mask so that it is the layer above the photo mask.

    5. Right click and select CreateClipping Mask or Ctrl+G (Mac: Cmd+G) to clip it together.
    6. To use it in a layout, select the Layer and right click, choose Merge Visible.
    7. Drag or Duplicate the photo onto your layout
    Tip: If your background layer is locked, double click on it and re-name it. This will un-lock the layer.
    Tip: Change the opacity of the brush in the layers to show or hide more of your photo. 

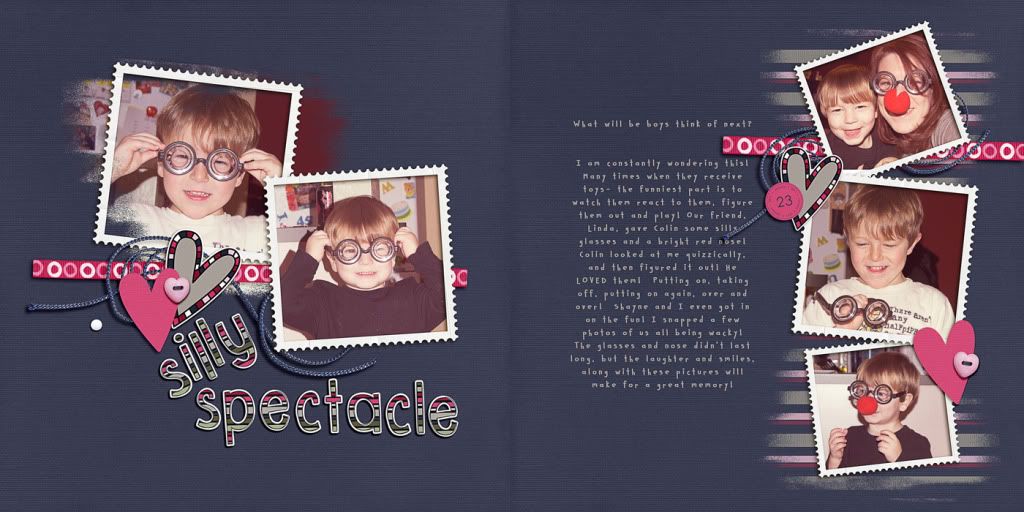
    Here is a layout that I made that shows off the versatility of clipping masks and how they can be changed for different looks. In my example, I used Jennifer Labre's Love Me Do (Link:  http://shop.scrapmatters.com/product...tid=7677&cat=6, Happy Scrap Girl's, Blend It Masks 2 (Link: http://shop.scrapmatters.com/product...6&cat=0&page=1) as well as Happy Scrap Girl's Ultimate Date Material (Link: http://shop.scrapmatters.com/product...7&cat=0&page=1. On the Left side of the double, I masked my photo, a nice effect and makes the pictures similar but different. On the right side of the spread, you can see faded stripes under the photos. That is the mask with a paper clipped to it! I adjusted the opacity down, and then changed the blending mode to "Lighten" ti give it a different effect. Such a simple change, and it really makes for fun masking! Try it out!


    Fading Gradient Mask:
    1. Open your photo in PSE or PS.
    2. Start a New Document, by Right Clicking and Duplicating your photo in a New or Untitled file. Save.
    3. Within the Layers Palette, click on the "Mask" icon at the bottom of the palette. This will add a layer mask, which you can see next to my photo. This fade is essentially a white/black fade mask. White allows the picture to show through, while black will hide the picture. Grey areas will affect how transparent (aka opacity) of the picture.
    4. Go to the Toolbars, and use the Gradient Tool.

    5. Click on your layer mask in the Layers Palette, so you know you are going to create your mask in the correct location.
    6. Click on the bottom of your picture in the middle and hold your mouse. Now, drag the cursor upward. Stop where you want the fade to end. Let the mouse button go. A faded layer mask - complete.
    Tip: Set your foreground color to black (that is the one on top).
    Tip: Hold the Shift key to make your cursor move in a straight line.


    Brush Masks:
    1. Open your photo in PSE or PS.
    2. Start a new document by right clicking and duplicating your photo to a new or Untitled file. Save.
    3. Within the Layers Palette, add a new layer. (This new layer should be above your photo).
    4. Click on Layer in the Menubar, then choose New Fill Layer. Choose Solid Color, and then OK.
    5. Lower the Fill Layer's opacity until you can see the photo underneath.
    6. Choose the Brush Tool and select a soft, round brush from the menu.
    7. Choose black as the Foreground Color.
    8. Select the Mask on the Fill Layer -- this is the second square. Start painting in a zig zag or scribbly motion.
    Tip: In the above example, you were looking at a white filled layer above your photo. Fill with different colors that may complement your photo. 
    Tip: Before Brushing, change the opacity, and try out different amounts.

    Texture Tip for Photoshop Users:
    Click on the Brush Palette Tab, then click on the word Texture. Adjust the texture scale and depth to give a slight texture to the brush, according to your taste. Pictured here is Wrinkles texture on default options.Try out different textures and lay with the scales, depths, and Blending Mode to see what you can come up with. 

    This image shows a faint change in the texture on the mask. A bit of texture can change up any image. Cool tool! 


    Now that you know a little bit more about masking and different techniques, try it out! Remember to duplicate your photos and save the files as you work! Play with the opacity, different blend modes for textures and the color fills. You might just have found a new favorite technique to try on your layouts! Have fun!


    I originally created this tutorial for the ScrapMatters Newsletter for February.  Sign up to the ScrapMatters Newsletter (more like a 20 page magazine) and get more tutorials like this, fun freebies, and great articles: HERE!

    Thanks for visiting.... 
    Jenn (jk703)